So this is a project I have been working on since December of 2017. If there was one thing i hated about the 155 wb van with the duramax is that it was useless once you left the pavement. I have been stuck on wet grass, a dirt driveway and don't even think of driving it in the winter. Now, I ran my van as a cargo van so it was not loaded with tools, I am sure if I had 1500-2000 pounds of tools it would have been a tank.
My goals for this project are
I want to give a shout out to the following builds that i studied/copied. I did not post any links but they are worth finding and reading.
My plan for this thread is to show another option for a 4x4 van. I will post any part numbers so that the next person does not have to spend hours on the internet looking for just the right part.
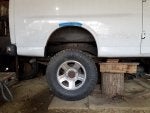
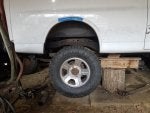
To get the ball rolling here is a picture of the van last fall when I parked it in my shop and here is what it looks like today with a little photo shop paint work to get everyone's attention
Mike
My goals for this project are
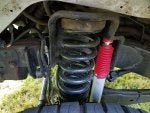
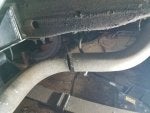
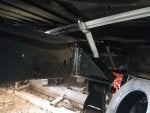
- Make it off pavement capable.
- Install 35" tires to give me frame clearance with the LWB.
- Maintain the soft coil spring ride quality.
- Outfit the interior as a boon docking camper.
- Minimize the amount of custom parts for the 4x4. I wanted to be able to buy off the shelf replacement parts as much as possible.
I want to give a shout out to the following builds that i studied/copied. I did not post any links but they are worth finding and reading.
- Johny5's Stealth Camper Van on Expedition Portal - SAS van swap.
- BigLBZPower08 Duramax SAS with 05+Dana 60 on Pirate 4x4 - Ford axle in a GM truck a lot of small detail information.
- Jlane330 build on DP - :thumb:
- LCAC_Man build on DP - :thumb:
My plan for this thread is to show another option for a 4x4 van. I will post any part numbers so that the next person does not have to spend hours on the internet looking for just the right part.
To get the ball rolling here is a picture of the van last fall when I parked it in my shop and here is what it looks like today with a little photo shop paint work to get everyone's attention
Mike