So after starting down the path of a Duraburb: http://www.dieselplace.com/forum/63...m-diesel-engines/374-frankenstein/875154-duraburb-planning-budgeting-phase.html
I realized what I really wanted was an expedition style van.
I'll continue to track budget on this build same as I was on the suburban. I sold the Suburban last week, and returned the radiator. So my starting point with the Duramax/Allison package that I have is $7100 invested. To summarize that is with a new water pump, new front and rear main seals, rebuilt turbo with billet wheel, magnaflow downpipe, full EGR removal, PCV reroute, Nicktane filter adapter, LMM torque converter, Transgo Jr. kit installed and transfer case pump rub kit installed. Engine has 156k on it, trans has 88k on it.
I've made a deal on a 2000 Express 3500 Hightop $8500 and a 2006 Express Duramax 3500 159" cutaway (blown engine) $2000 owner is pulling the box off so I'm picking it up this Thursday.
so I'm at $17600 as it sets now.
There's a couple ways to skin this cat but what I hope to do is move the hightop body over to the cutaway frame after I get everything installed and working on it. (and build rear body mounts and shorten it 4"). This will keep me in a functional vehicle and allow the majority of the problem solving to occur on the cutaway.
Front axle will likely be a coil sprung F350 Dana 60 or maybe a Dodge Dana 60.
I'll also likely transfer the entire dash/wiring from the 06 to the 00 to make it more compatible with my engine/trans package.
I'd like to keep the electric shift transfer case but that's something that I'll get to later. Dash cluster solution will also be a challenge...Any input is welcome...even if you want to tell me I'm off my meds..
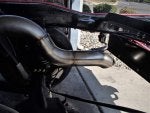
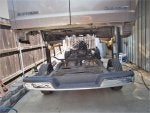
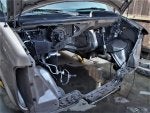
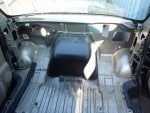
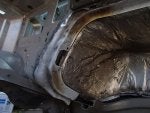
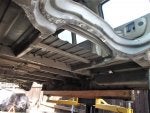
Anyways, here's some pic's of what I'll be starting with.
I realized what I really wanted was an expedition style van.
I'll continue to track budget on this build same as I was on the suburban. I sold the Suburban last week, and returned the radiator. So my starting point with the Duramax/Allison package that I have is $7100 invested. To summarize that is with a new water pump, new front and rear main seals, rebuilt turbo with billet wheel, magnaflow downpipe, full EGR removal, PCV reroute, Nicktane filter adapter, LMM torque converter, Transgo Jr. kit installed and transfer case pump rub kit installed. Engine has 156k on it, trans has 88k on it.
I've made a deal on a 2000 Express 3500 Hightop $8500 and a 2006 Express Duramax 3500 159" cutaway (blown engine) $2000 owner is pulling the box off so I'm picking it up this Thursday.
so I'm at $17600 as it sets now.
There's a couple ways to skin this cat but what I hope to do is move the hightop body over to the cutaway frame after I get everything installed and working on it. (and build rear body mounts and shorten it 4"). This will keep me in a functional vehicle and allow the majority of the problem solving to occur on the cutaway.
Front axle will likely be a coil sprung F350 Dana 60 or maybe a Dodge Dana 60.
I'll also likely transfer the entire dash/wiring from the 06 to the 00 to make it more compatible with my engine/trans package.
I'd like to keep the electric shift transfer case but that's something that I'll get to later. Dash cluster solution will also be a challenge...Any input is welcome...even if you want to tell me I'm off my meds..
Anyways, here's some pic's of what I'll be starting with.